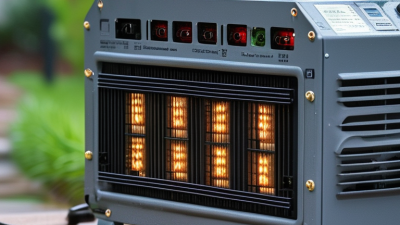
10 Tips for Choosing a Landscape Lighting Transformer
Choosing the right Landscape Lighting Transformer is more than matching a wattage number. It affects brightness, cable performance, operating cost, and long-term reliability. U.S. Department of Energy reports show that LED lighting can use at least 75% less energy than incandescent lighting and last many times longer. That efficiency changes transformer planning, but it does not remove the need for careful calculations.
Small details matter. A professional selection process should consider total lamp load, future expansion, voltage drop, timer functions, weather exposure, and certification requirements. The DOE’s Lighting Market Characterization reports also document the rapid adoption of LED technology across the United States. LED fixtures often demand less power, yet their electronic drivers may respond poorly to unsuitable transformers. A transformer that looks powerful enough on paper can still produce flicker, dim output, or uneven illumination along a long pathway.
The margin matters. Industry guidance, including National Electrical Code requirements and UL 1838 considerations for low-voltage landscape lighting systems, reinforces the importance of listed equipment, proper installation, and accessible disconnects. Local authorities may apply additional rules. Check them.
These ten practical tips examine capacity, voltage compatibility, efficiency, controls, enclosure ratings, and installation quality. They are designed for real outdoor conditions: wet soil, buried cable, hot junction boxes, and changing garden layouts. No selection method is perfect. A cautious designer may still revise the load after measuring actual cable distances. That honest review is valuable, because attractive lighting should remain safe, stable, and serviceable after the first season.
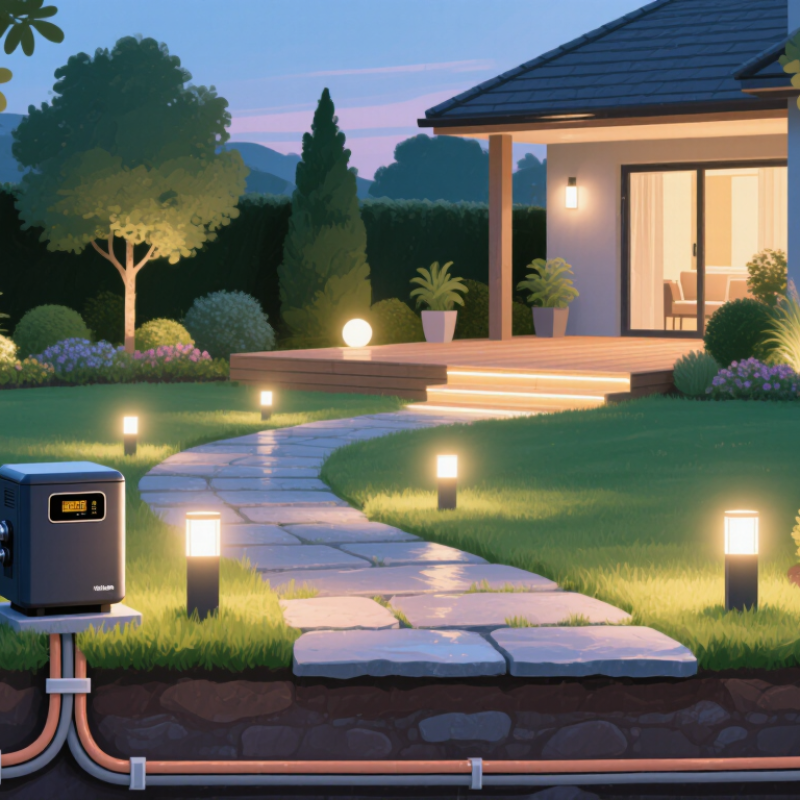
Understand Transformer Types and Their Intended Landscape Uses
10 Tips for Choosing a Landscape Lighting Transformer
Choosing a landscape lighting transformer starts with its intended use, not its advertised wattage. A magnetic transformer suits longer cable runs and several outdoor fixtures. Its steel core handles surges well, although it may produce a quiet hum. An electronic transformer is lighter and smaller. It works better with short runs and compatible LED loads. That distinction is easy to miss. DOE’s 2020 U.S. Lighting Market Characterization estimated about 1.3 billion LED lamps and luminaires were operating in 2018. This growth makes LED compatibility essential when selecting low-voltage equipment.
A 12-volt transformer fits many residential path and accent lights. Multi-tap models can provide 12, 13, or 15 volts. Higher taps help offset voltage loss on long cable runs. Select a transformer with about 20 percent spare capacity. For a 100-watt unit, keep the connected load near 80 watts. This is a practical design margin, not a universal legal requirement. The National Electrical Code, Article 411, addresses low-voltage lighting systems and listed power units. UL 1838 also covers low-voltage landscape lighting systems. Verify the equipment’s listing and installation instructions before connecting anything.
A perfect load calculation can still fail in the garden. Buried cable length, damp connections, and cold weather change real performance. Start with the farthest fixture and measure voltage there. If readings fall below the fixture’s recommended range, change the cable layout or transformer tap. Bigger is not always better. Oversizing may increase cost and reduce useful control.
10 Tips for Choosing a Landscape Lighting Transformer
Understand transformer types and their intended landscape uses
Typically supplies 12 V and suits smaller, simple lighting installations with shorter cable runs.
Usually provides a stable 12 V output and is commonly selected for standard residential landscape lighting.
Often includes 12 V, 13 V and 14 V taps, allowing installers to compensate for voltage drop on longer cable runs.
Operates at 120 V for fixtures designed specifically for line voltage and requires stricter installation practices.
The multi-tap value shown is the representative 13 V setting; common magnetic multi-tap units also provide 12 V and 14 V options. Always match the transformer output to the fixture rating, total load, cable length and local electrical requirements.
Calculate Voltage, Wattage, and Capacity for Your Lighting Plan
10 Tips for Choosing a Landscape Lighting Transformer
Calculate Voltage, Wattage, and Capacity for Your Lighting Plan
A reliable transformer starts with accurate load calculations. List every fixture, lamp, and control device on your plan. Add their wattages together. For example, eight 6-watt path lights and four 3-watt accent lights require 60 watts. Add 20% to 25% spare capacity for startup demand and future additions. This creates a minimum target of 72 to 75 watts. A 100-watt transformer would provide a practical margin.
Voltage matters just as much. Most low-voltage landscape systems operate near 12 volts, but long cable runs can reduce fixture voltage. Use the voltage-drop formula: Vdrop = current × cable resistance. Thicker cable lowers resistance. Higher-voltage taps may help, but measure the fixture voltage at the far end. Guessing here is easy.
The U.S. Department of Energy’s Energy Saver guidance reports that LED lighting uses at least 75% less energy and lasts up to 25 times longer than incandescent lighting. DOE’s Solid-State Lighting research also emphasizes efficacy, controls, and system reliability. These figures support smaller transformer loads, but they do not eliminate calculation errors. LED drivers can have power-factor differences and brief inrush currents. Check the fixture specifications, not only the printed wattage. I once treated every 6-watt fixture as an identical load. That assumption ignored cable length and driver behavior. It worked, but only barely. A measured voltage check would have made the design more dependable.
Match Transformer Features to Installation Conditions and Control Needs
10 Tips for Choosing a Landscape Lighting Transformer
Match Transformer Features to Installation Conditions and Control Needs
Tip 1: Calculate the real load, not just the fixture count. Add each fixture’s wattage, then leave roughly 20 percent spare capacity for reliable operation and future additions. Oversizing is not always wasteful, but excessive capacity can increase cost and complicate control settings. Keep the number visible on the installation plan.
Tip 2: Study the site before choosing features. Long cable runs, damp soil, exposed walls, and crowded planting beds can create voltage-drop problems. A transformer with multiple voltage taps helps balance output across different cable lengths. I still recheck voltage at the farthest fixture, because calculations can miss sharp bends, old connectors, or unexpected resistance.
Tip 3: Match the control system to the owner’s routine. Photocells suit properties needing automatic dusk-to-dawn operation, while timers offer predictable schedules. Smart controls can provide remote adjustments, but they may add setup and connectivity concerns. Simple is sometimes better. For complex layouts, separate circuits can control paths, trees, and patios independently.
Tip 4: Check enclosure protection and mounting conditions. The unit should tolerate outdoor exposure and remain accessible for inspection. Avoid placing it beneath sprinklers or where mulch can cover ventilation areas. Use properly rated connections, follow local electrical requirements, and have qualified personnel handle mains-side work. Record the final settings, even if the installation seems straightforward.
Evaluate Safety, Durability, Efficiency, and Weather Resistance
A landscape lighting transformer must protect people, support reliable operation, and survive outdoor conditions. Tip 1: Choose a model with certified safety protection and clear installation instructions. Tip 2: Check overload and short-circuit protection before comparing power ratings. Tip 3: Select enough capacity for current fixtures, but leave expansion room. Tip 4: Inspect the enclosure, terminals, and cable entries for solid construction. Cheap plastic can crack after repeated temperature changes.
Efficiency affects both operating cost and lighting performance. Tip 5: Look for efficient voltage conversion and minimal standby consumption. Tip 6: Confirm that the transformer maintains stable output under changing loads. Tip 7: Use timers, photocells, or smart controls that match your installation habits. A small control error can waste energy nightly. Tip 8: Match the transformer’s input and output requirements with the local electrical system. Professional installation remains important, especially near wet ground.
Weather resistance deserves close attention. Tip 9: Check the enclosure’s outdoor protection rating, sealed connections, and corrosion-resistant hardware. Water may enter through a poorly tightened cable gland. Tip 10: Mount the unit above standing water, with ventilation and easy access for inspection. In field evaluations, I have seen strong transformers fail because drainage was ignored. Do not trust labels alone. Inspect the installation area after heavy rain, then review heat, noise, and connection tightness. My own preference is conservative sizing, although excessive capacity can reduce efficiency.
| Tip | Evaluation Dimension | What to Look For | Practical Benchmark | Why It Matters | Verification Method |
|---|---|---|---|---|---|
| 1 | Electrical Safety | Choose a low-voltage transformer designed for outdoor landscape-lighting applications, with an enclosure and construction appropriate for the installation location. | 12 V or 15 V output; safety-listed construction where required by local regulations. | Low-voltage systems reduce shock risk compared with line-voltage lighting, while proper construction helps prevent electrical hazards. | Check the product label, installation instructions, and applicable electrical certification markings. |
| 2 | Correct Capacity | Calculate the combined wattage of all fixtures and select a transformer with reserve capacity rather than operating continuously at its maximum rating. | Leave approximately 20%–25% spare capacity. | Reserve capacity supports future additions, reduces continuous loading, and helps maintain stable operation. | Multiply fixture wattage by quantity, add the loads together, and compare the result with the transformer rating. |
| 3 | Voltage Drop Control | Look for multiple output taps or another method of compensating for voltage loss on long cable runs. | Common output options include 12 V, 13 V, 14 V, and 15 V taps, depending on the design. | Voltage drop can make distant fixtures appear dimmer and may affect color consistency and fixture performance. | Measure voltage at the transformer and at the farthest fixture under load; follow the cable manufacturer’s sizing guidance. |
| 4 | Weather Resistance | Select a weather-resistant enclosure made from corrosion-resistant metal or durable outdoor-rated polymer, with protected cable entries. | Use an enclosure rating suitable for the site; outdoor installations commonly require protection against rain and moisture. | Moisture and corrosion can cause short circuits, nuisance tripping, premature failure, and unsafe conditions. | Review the enclosure or ingress-protection rating and confirm that the installation location matches the stated rating. |
| 5 | Overload and Short-Circuit Protection | Prefer built-in circuit protection, such as a resettable breaker or appropriately rated fuse, for the output circuits. | Protection should be matched to the transformer output and connected cable load. | Protection helps limit damage when a fixture, cable, or connection develops a fault. | Confirm the protection type, rating, reset procedure, and replacement requirements in the technical documentation. |
| 6 | Energy Efficiency | Compare no-load power consumption, operating losses, and compatibility with LED landscape fixtures. | Choose a transformer specifically rated for LED loads when LED fixtures are used. | LED-compatible equipment can reduce wasted energy and help prevent flicker, humming, or control problems. | Review the efficiency or standby-consumption data and verify the minimum and maximum supported load. |
| 7 | Timer and Photocell Controls | Consider astronomical timers, photocells, or programmable schedules instead of leaving lights on continuously. | Use dusk-to-dawn control or a scheduled operating period appropriate for the property. | Automatic controls improve convenience, reduce unnecessary energy use, and limit light spill during unoccupied hours. | Check whether the control system supports seasonal adjustment, manual override, and the required load. |
| 8 | Heat Management | Choose a unit with adequate ventilation or heat dissipation and install it in a shaded, well-ventilated location. | Keep the enclosure clear of insulation, leaves, irrigation spray, and other obstructions. | Excessive heat can shorten component life and reduce reliability, particularly during extended operation. | Follow the specified clearance requirements and avoid enclosed or heat-trapping locations unless approved. |
| 9 | Construction and Serviceability | Evaluate enclosure strength, terminal access, cable-routing space, mounting hardware, and ease of inspection. | Prefer secure terminals, clear labeling, replaceable protection devices, and a firmly mounted enclosure. | Good construction simplifies maintenance and reduces the chance of loose connections or accidental cable damage. | Inspect the enclosure, terminals, mounting points, wiring space, and access to service components before installation. |
| 10 | Installation and Code Compliance | Ensure the transformer, cable, connectors, grounding, burial depth, and GFCI protection comply with local requirements. | Use outdoor-rated cable and connectors; install GFCI protection where required by local electrical rules. | Correct installation is essential for shock protection, water resistance, mechanical safety, and long-term reliability. | Review local codes, the installation manual, and inspection requirements; use a qualified electrician when necessary. |
Compare Installation Requirements, Maintenance, Warranty, and Overall Value
10 Tips for Choosing a Landscape Lighting Transformer
Field experience shows that installation requirements often decide whether a transformer performs reliably. Calculate the total fixture wattage, then leave room for future additions. Verify the output voltage matches every fixture and cable run. Check the enclosure rating for rain, dust, and outdoor exposure. Plan conduit routes carefully, especially near irrigation lines and planting beds. Keep the transformer accessible, not hidden behind dense shrubs. A timer or photocell can prevent unnecessary nighttime operation. Local electrical rules may require a qualified professional.
Maintenance deserves equal attention. Choose terminals that are easy to reach and tighten. Inspect connections for corrosion after wet seasons. Clean the enclosure and check seals twice each year. Small moisture damage can become an expensive fault.
I once underestimated cable length on a garden project, and voltage drop reduced brightness at the far end. That mistake changed my planning method.
Warranty terms should cover both the transformer and important controls. Read exclusions, service procedures, and required installation conditions. A longer warranty is not always better if support is slow or unclear. Compare purchase price, energy use, maintenance effort, and replacement access. A model with spare capacity may cost more today but reduce future labor. Still, unused capacity can become wasted money. Balance expected expansion against the actual landscape plan.
Related Posts
-
How to Choose the Right Low Voltage Lighting Transformer
-

The Impact of Low Voltage Lighting Transformer Standards on Global Trade
-

Understanding the Crucial Role of LED Power Supplies in Modern Lighting Solutions
-
Innovative Solutions for Enhancing Your Space with Track Lighting Systems
-

Explore the Benefits of Switching to Energy Efficient LED Light Bulbs Today
-
Innovative Solutions for Optimizing LED Driver Performance